Using Accessit Library With Serialised Items
Asset Management is an absolute necessity from an accounting perspective as well as just being good practice.
There are a number of ways to achieve this, be it on a spreadsheet, a dedicated asset management platform or any other way, shape or form.
In order to do this effectively, you need to know exactly which instance (copy) of the item you need to track. This normally means issuing a sequential asset number which will then be printed onto a label or etched into the device... effectively making it unattractive if you ever want to sell off the item in the future.
However, if you have serialised items (e.g. most computers, tablets, phones etc.), you have a built-in and irrefutable way of knowing exactly which resource you need to track... that is, it's serial number.
If you work in a school, it's likely that you will be using a Library Management system. In this article, we'll make this assumption and further, that you're using Accessit Library.
The first thing you'll need to do is take stock of your various assets including the serial number of each item (or device). Once you have these in a spreadsheet, export the list as a CSV.
Now you're ready to import the devices so open up Accessit and perform the following steps (similar to taking on a book or other resources):
- If you are not using pre printed barcodes, Accessit will automatically generate barcodes for each device imported. To change this, go to Library setup => Campus Setup => Functional Settings => tick 'Use pre-printed barcodes'.
- Create the new resource.
- Title - the common name to the level you want to track the items (e.g. HP Chromebook 5000 series, or iPad WiFi 5th Generation)
- Publisher - the manufacturer (e.g. HP, Apple etc.)
- Year - choose either the first year of manufacture or the first time you purchased that model
- Other details - give your first copy a cost, replacement cost, supplier etc.
- then go to Actions => create copy => import from file => navigate to your csv file that just has the serial numbers that you are wanting to allocate as barcodes for the items (or devices). You will see you have the option to carry over the supplier, cost, replacement cost etc.
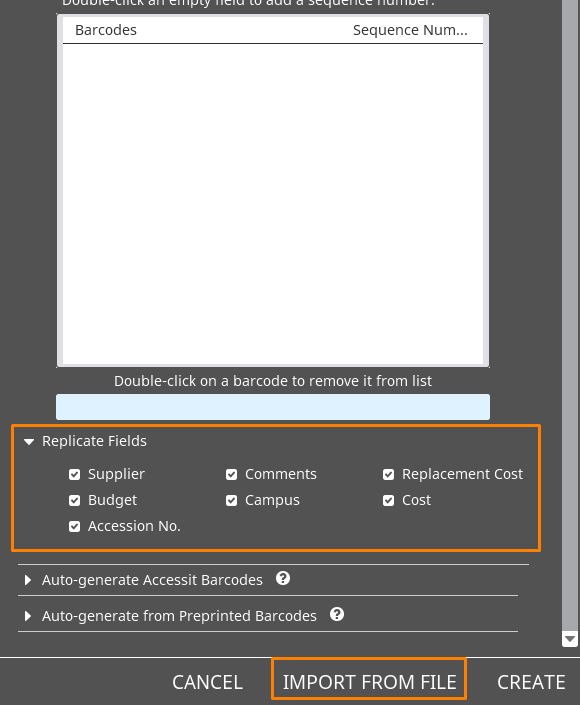
- Once this process is complete, you will have all the devices imported as copies of the original resource which you can then issue and return as you would any other resource. You can also print labels to affix to each item so that you can take stock with a barcode scanner if the item doesn't have an easily accessible barcode.
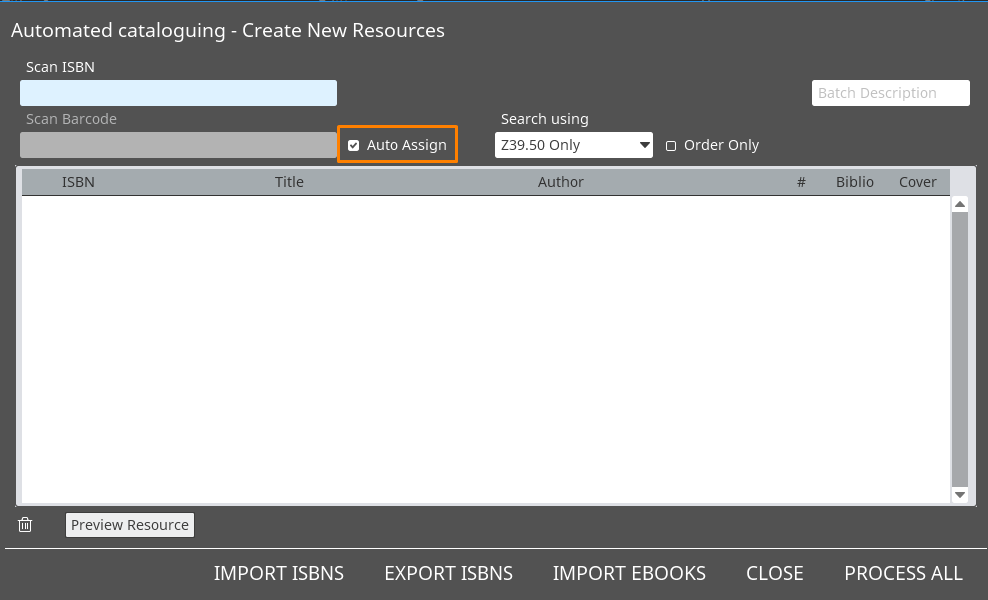
- Before finishing up, if you weren't previously using pre-printed barcodes, you will either need to untick the 'Use pre-printed barcodes' option above, otherwiseyou can leave it ticked and change your workflow for cataloguing books. This will simply require you to tick the box 'Auto Assign' before scanning in the ISBN's of these new books:
Share :