Automatically forward some or all Google Mail messages to another account
There are a number of reasons why you may want to forward all or only certain types of messages as they arrive in your inbox to another email address. These reasons may include anything from archival to a change of domain.
If you own the source Google Workspace environment, this is more easily achieved using the Google Admin Console. If you don't own it (or you're using a free Gmail address), you will need to perform the following steps for each user.
The basic steps involve adding a forward-to address from the source account, approving it as the forward-to address and then selecting which emails you want to forward.
Please note: You can only perform the following from a web browser on your computer, and not from the Gmail app on a mobile device.
1. Turn on automatic forwarding
- On your computer, open Gmail using the account you want to forward messages from. You can only forward messages for a single Gmail address, and not an email group or alias.
- In the top right, click the Settings icon
:
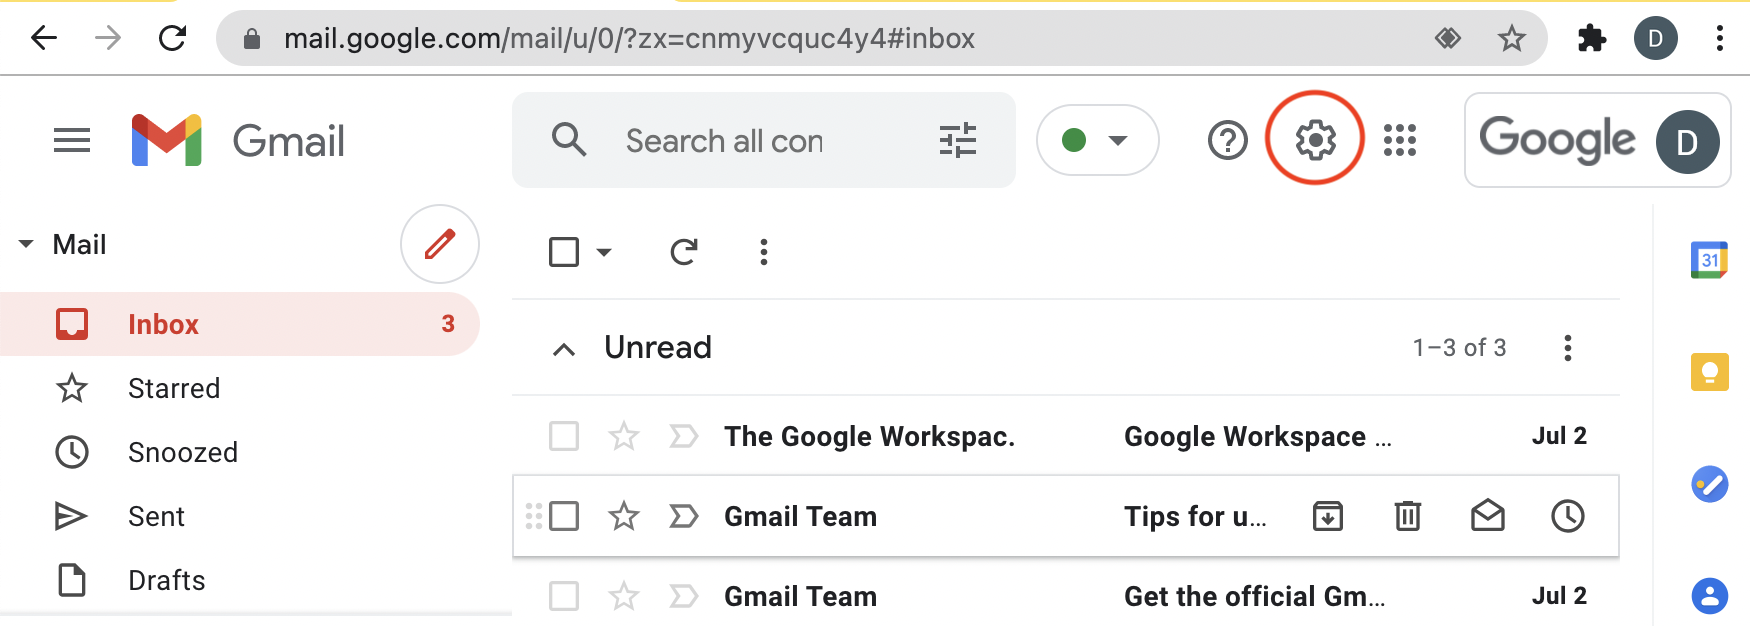
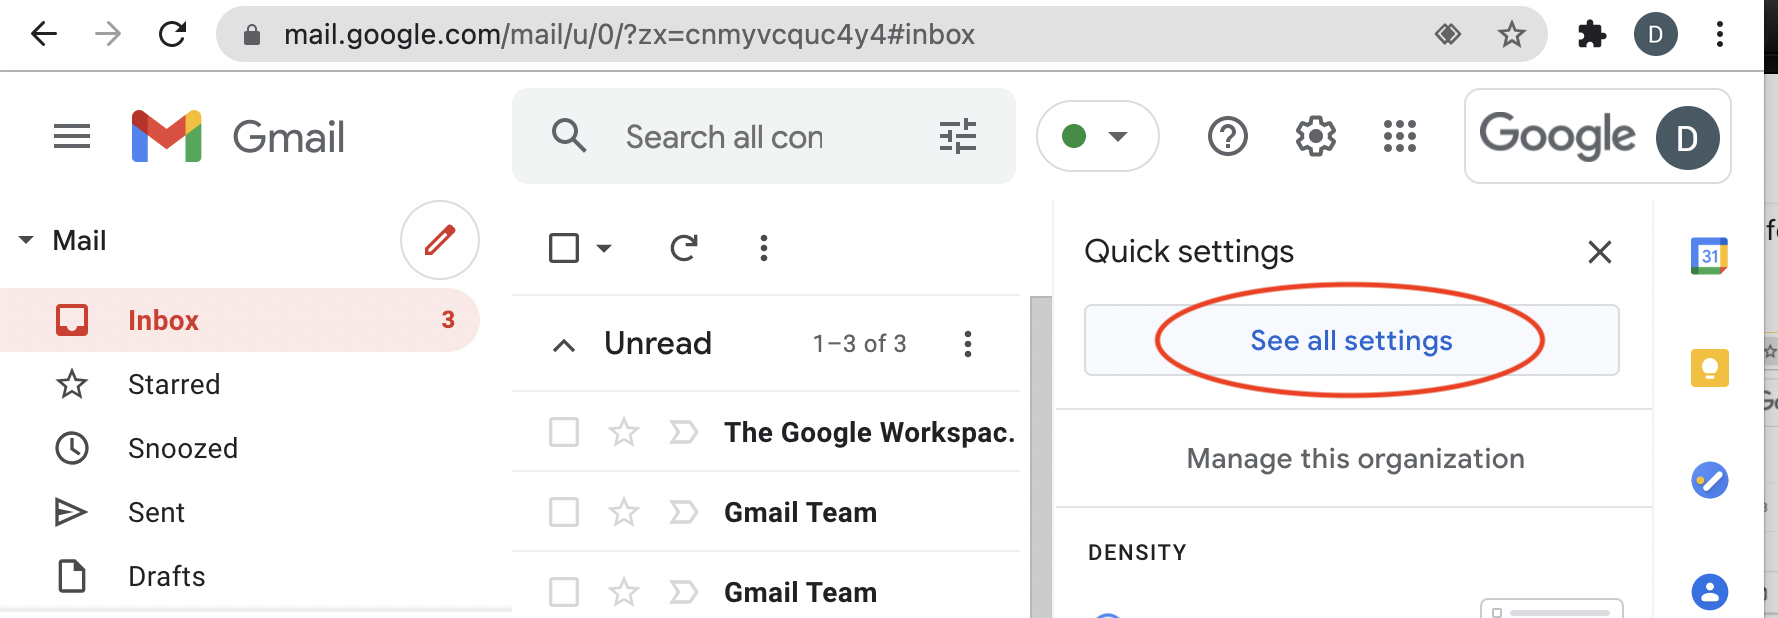
- Click on "See all settings":
- Click the Forwarding and POP/IMAP tab:

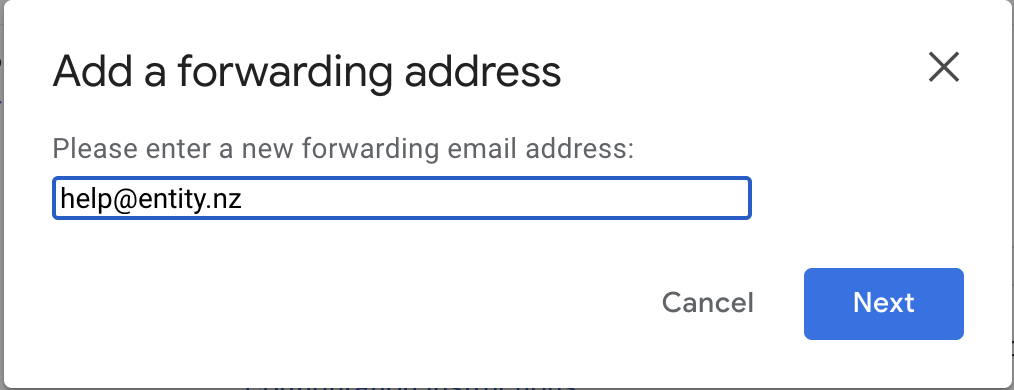
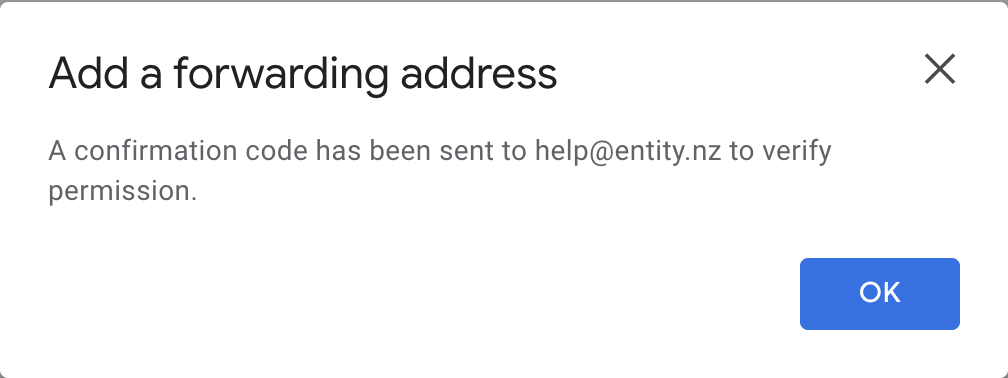
- In the "Forwarding" section, click Add a forwarding address:

- Enter the email address you want to forward messages to:
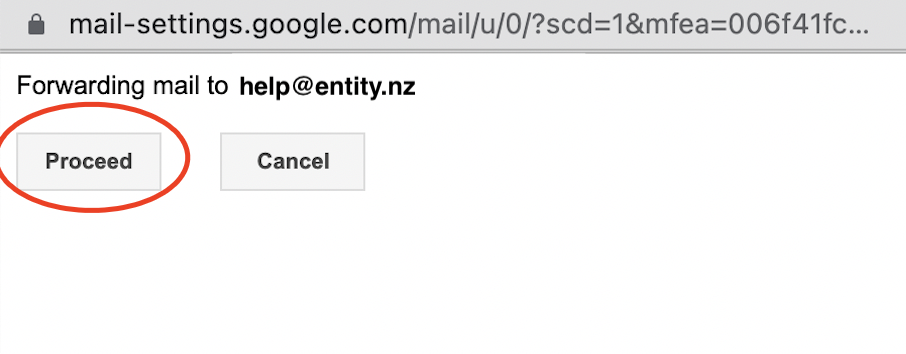
- A new window will open checking whether you wish to proceed, click on Proceed:
- This will close the new window and take you back to the previous one with a message telling you that a confirmation code has been sent to the address you provided - this is done to confirm that the email address receiving the forwarded mail is, in fact, under your control:
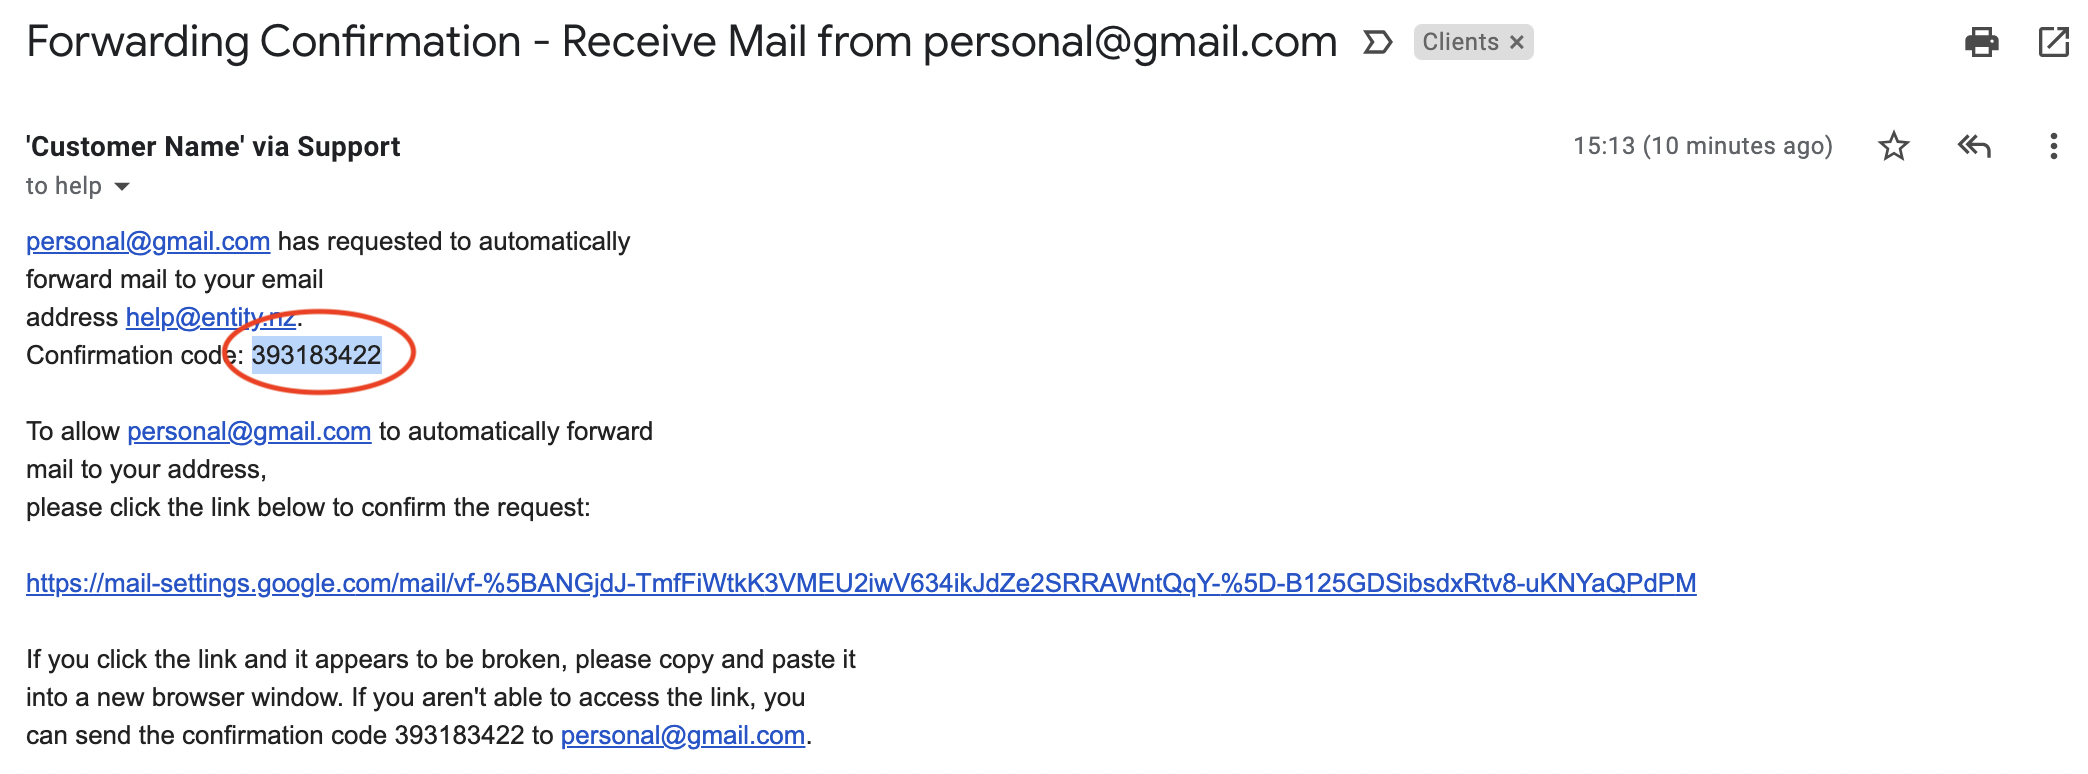
- At this point, swap over to your other email account (the one you want to forward email to). You will see a message like this:

You can either click on the link provided or copy the Confirmation code and paste it into the sending email settings. If you choose to click the link, you don't need to do the next step.
If you don't have access to the email address being forwarded to, you will need to ask someone who does to follow this step. - Assuming you have copied the code, go back to your original email account, follow the same steps above and paste in the confirmation code in the box below:
- Whichever way you choose, after you have verified the forwarding, you will now notice that the settings page has changed a little.
Depending on your use case, there are now two options, forward all email to the forwarded email address you have just set up (easier), or forward only specific messages:
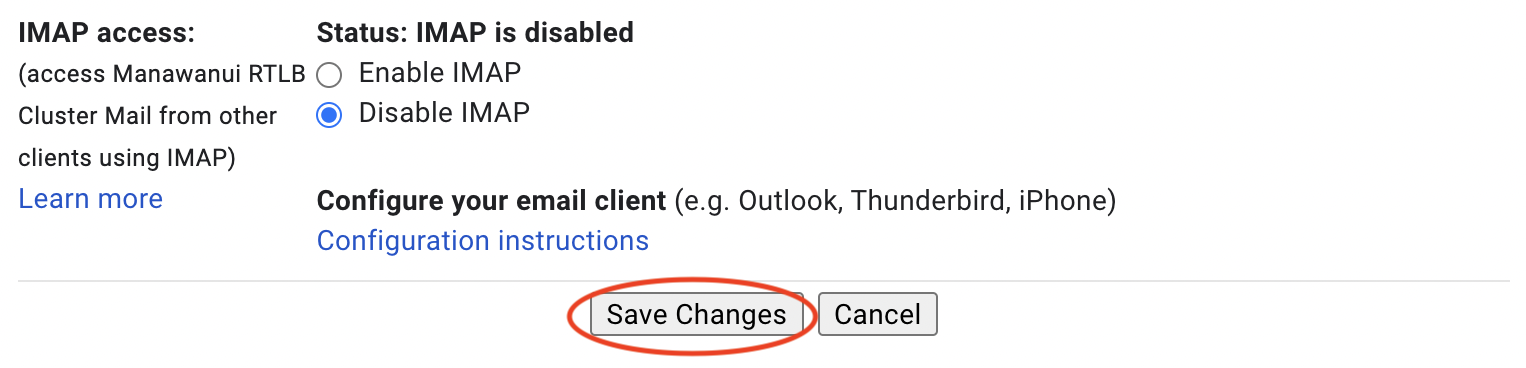
2. (a) Forward all email
- Assuming you want to forward all your emails, you can stay on the Forwarding and POP/IMAP settings page:

You should consider what action you would like to take on the email in your original email box. We would suggest marking the local copy as read which means that the original email is still available if anything goes wrong, but you will know that the relevant emails have been successfully forwarded if they are marked as read. - Scroll to the bottom of the page and click on Save Changes:

2. (b) Forward selected email
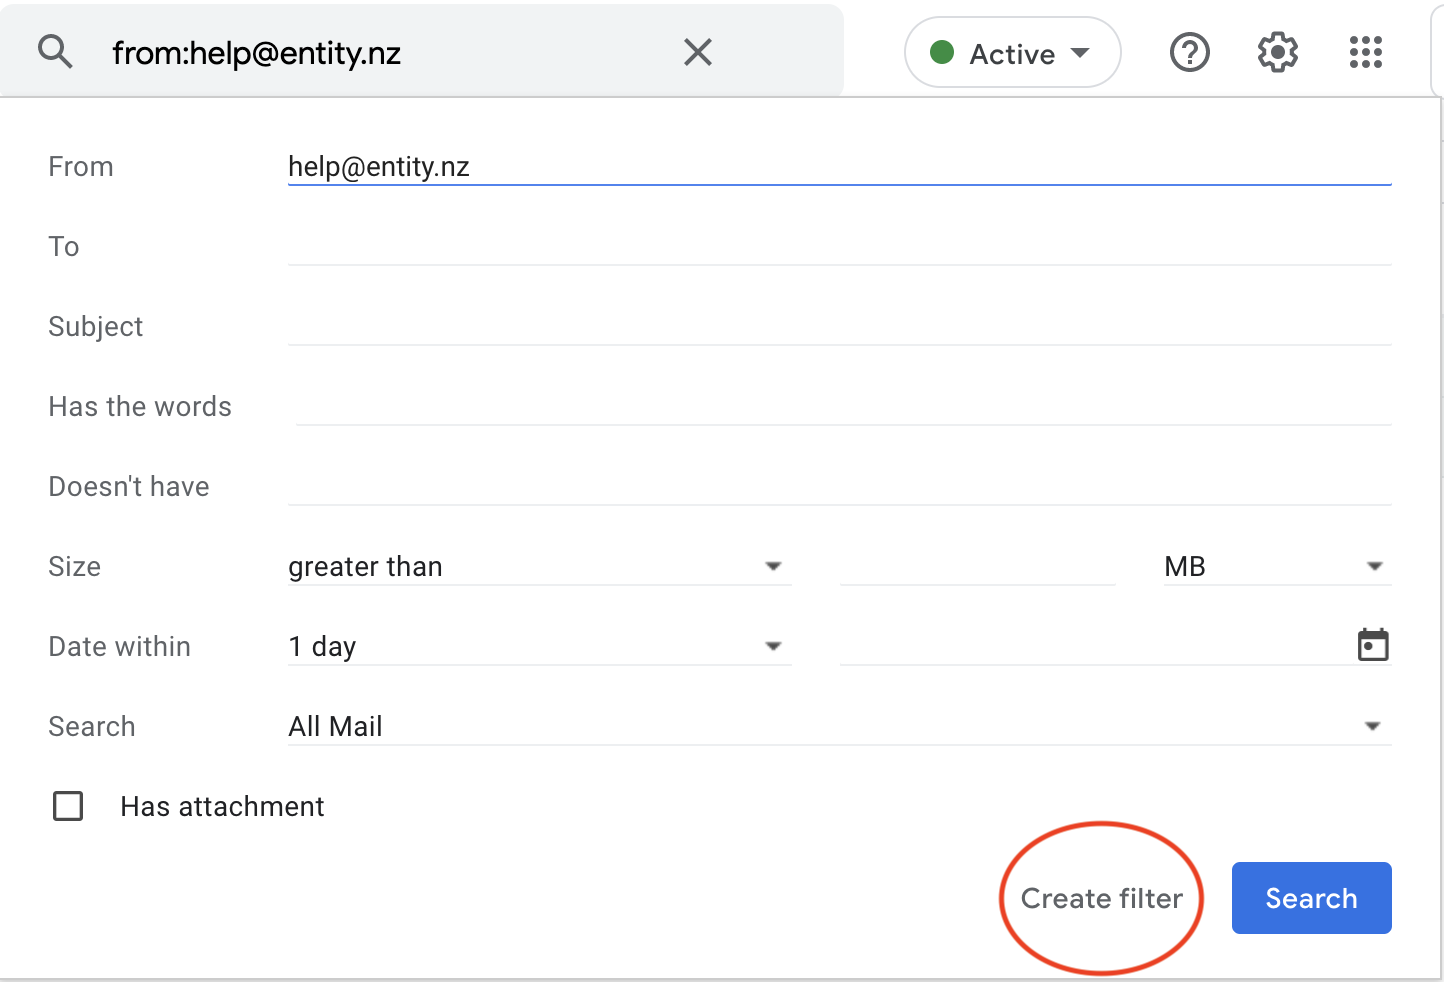
- Once you have set up the forwarding address (step 1), go to your Inbox and search for emails that match your criteria for forwarding:
- Click on the Search Options dropdown on the right of your search box:

- We have highlighted the most common options we use on the next screen which specifies what to do with the original email. Make this relevant to your needs and then click on Create filter on the bottom of the window:
That's it. You're done.
If you need any assistance with this, please contact us and we'll be more than happy to assist in person or remotely.
Share :